


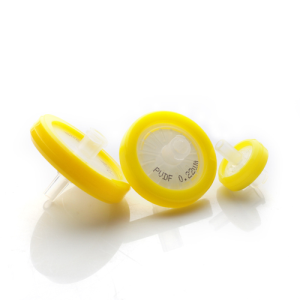


Installing a Syringe Filter RC (Regenerated Cellulose) is a straightforward process, but it requires attention to detail to ensure proper functionality and optimal filtration results. As a trusted supplier of Syringe Filter RC, I'm here to guide you through the step-by-step installation process, provide valuable tips, and address common questions.
Understanding Syringe Filter RC
Before we dive into the installation process, let's briefly understand what a Syringe Filter RC is and its applications. Syringe Filter RC is made from regenerated cellulose, a highly pure and hydrophilic material. It offers excellent chemical compatibility, low protein binding, and high flow rates, making it suitable for a wide range of applications, including sample preparation, HPLC, GC, and general filtration.
Materials Needed
- Syringe Filter RC: Ensure you have the appropriate size and pore size for your application. You can explore our diverse range of Syringe Filter PES and 4mm Syringe Filter options to find the perfect fit.
- Syringe: Select a syringe with a compatible Luer lock or slip tip that matches the filter's inlet.
- Sample Solution: The solution you need to filter.
- Collection Vessel: A clean container to collect the filtered sample.
Step-by-Step Installation Guide
Step 1: Prepare Your Workspace
- Ensure your workspace is clean and free from dust and contaminants.
- Wash your hands thoroughly or wear clean gloves to prevent contamination of the filter and sample.
Step 2: Inspect the Syringe Filter RC
- Carefully examine the filter for any visible damage, such as cracks or tears. If the filter is damaged, do not use it and replace it with a new one.
- Check the filter's pore size and diameter to ensure it is suitable for your application.
Step 3: Attach the Syringe Filter RC to the Syringe
- If your filter has a Luer lock fitting, firmly screw the filter onto the syringe tip in a clockwise direction until it is securely attached. Make sure not to overtighten, as this may damage the filter or the syringe.
- For filters with a slip tip fitting, gently push the filter onto the syringe tip until it is snugly in place.
Step 4: Prime the Filter
- Draw a small amount of the sample solution or a compatible solvent into the syringe.
- Slowly push the solution through the filter to wet the membrane and remove any air bubbles. This process, known as priming, helps to ensure optimal filtration performance.
- Discard the priming solution into a waste container.
Step 5: Load the Sample
- Draw the sample solution into the syringe, taking care not to introduce air bubbles.
- If the sample contains particulate matter, you may want to pre - filter it using a GF Prefilter Syringe Filter to prevent clogging of the main filter.
Step 6: Filter the Sample
- Place the collection vessel under the filter outlet.
- Slowly and steadily push the plunger of the syringe to force the sample through the filter. Avoid applying excessive pressure, as this may cause the filter to rupture or affect the filtration efficiency.
- Continue filtering until all the sample has passed through the filter.
Step 7: Collect the Filtered Sample
- Once the filtration is complete, carefully remove the filter from the syringe.
- Transfer the filtered sample from the collection vessel to a suitable storage container for further analysis or use.
Tips for Optimal Installation and Filtration
- Proper Storage: Store your Syringe Filter RC in a cool, dry place away from direct sunlight and moisture. This helps to maintain the integrity of the filter membrane and ensure consistent performance.
- Avoid Cross - Contamination: Use a new filter for each sample to prevent cross - contamination. If you need to filter multiple samples, clean the syringe thoroughly between each use.
- Handle with Care: When handling the filter, avoid touching the membrane directly to prevent contamination. Hold the filter by the outer housing.
- Check Compatibility: Ensure that the sample solution is compatible with the filter material. Some solvents or chemicals may react with the filter membrane, affecting its performance.
Common Questions and Troubleshooting
- Filter Clogging: If the filter clogs during filtration, it may be due to a high concentration of particulate matter in the sample. Try pre - filtering the sample or using a filter with a larger pore size.
- Low Flow Rate: A low flow rate can be caused by air bubbles in the filter, a clogged filter, or incorrect installation. Try priming the filter again to remove air bubbles or replace the filter if it is clogged.
- Leakage: If you notice leakage around the filter - syringe connection, check that the filter is properly attached. If the problem persists, try using a different filter or syringe.
Conclusion
Installing a Syringe Filter RC is a simple yet crucial process that can significantly impact the quality of your filtration results. By following the steps outlined in this guide and implementing the tips provided, you can ensure a smooth and efficient installation process.


As a leading supplier of Syringe Filter RC, we are committed to providing high - quality filtration products and excellent customer service. If you have any questions about our products or need assistance with your filtration needs, please don't hesitate to contact us. We are here to help you find the best filtration solutions for your specific applications. Whether you are a researcher in a laboratory, a quality control professional, or involved in any other field that requires precise filtration, our Syringe Filter RC products are designed to meet your requirements.
Let's start a conversation about your filtration needs. We are eager to understand your specific applications and provide you with the most suitable Syringe Filter RC products. Contact us today to discuss your procurement requirements and explore how our products can enhance your filtration processes.
References
- "Filtration Handbook", Elsevier
- "Principles of Filtration in Analytical Chemistry", Wiley - VCH